 Save
Save I baked this tart on a rainy Saturday when I needed something that felt like a small celebration. The kitchen smelled like melted chocolate and butter, and I remember standing by the oven watching the edges puff up while the center stayed glossy and soft. It turned out richer than I expected, almost like a brownie disguised as something elegant. My neighbor tried a slice and said it tasted expensive, which made me laugh because it really just comes down to good chocolate and patience. Now I make it whenever I want dessert to feel a little special without much fuss.
I brought this to a dinner party once and set it on the table without saying much. Everyone got quiet after the first bite, which is the best kind of compliment. One friend asked if I used a secret ingredient, but honestly it was just dark chocolate doing all the work. I learned that night that dessert does not need to be complicated to make people happy, it just needs to taste like you cared enough to make it from scratch.
Ingredients
- All-purpose flour: Forms the base of both the tart shell and brownie filling, I sift it once to avoid lumps in the crust.
- Powdered sugar: Keeps the tart dough tender and a little sweet, granulated sugar would make it too crisp.
- Cold unsalted butter: Needs to stay cold so the crust turns out flaky, I cube it straight from the fridge.
- Egg yolk: Binds the dough without making it tough, the richness also adds flavor.
- Dark chocolate (70% cocoa): This is where the flavor lives, cheap chocolate will make the whole tart taste flat so I always buy a bar I would eat on its own.
- Granulated sugar and brown sugar: The mix gives depth, brown sugar adds a hint of molasses that plays well with dark chocolate.
- Eggs: Give the brownie filling structure, I let them come to room temperature so they blend smoothly.
- Pure vanilla extract: A little goes a long way, it rounds out the chocolate without stealing the spotlight.
Tired of Takeout? 🥡
Get 10 meals you can make faster than delivery arrives. Seriously.
One email. No spam. Unsubscribe anytime.
Instructions
- Preheat and prep:
- Set your oven to 350°F and grease your tart pan well, especially the fluted edges. I learned the hard way that skipping this step makes removing the tart a nightmare.
- Mix the tart dough:
- Whisk the flour, powdered sugar, and salt together, then rub in cold butter until it looks like wet sand. Add the egg yolk and a tablespoon of cold water, mixing gently until it just holds together.
- Chill and roll:
- Wrap the dough and let it rest in the fridge for 15 minutes, this makes it easier to roll without tearing. Roll it out on a floured surface and press it into the pan, trimming any overhang.
- Blind bake the shell:
- Prick the base with a fork, line it with parchment, and fill with pie weights or dried beans. Bake for 15 minutes, then remove the weights and bake another 5 minutes until it looks lightly golden.
- Melt the chocolate and butter:
- Use a double boiler or microwave in short bursts, stirring until smooth and shiny. Let it cool for a few minutes so it does not scramble the eggs later.
- Make the brownie batter:
- Whisk in both sugars, then add the eggs, vanilla, and salt until everything looks glossy. Fold in the flour gently, overmixing will make it cakey instead of fudgy.
- Fill and bake:
- Pour the batter into the cooled tart shell and smooth the top with a spatula. Bake for 18 to 20 minutes, the edges should be set but the center will still jiggle a little.
- Cool completely:
- Let it cool on a wire rack, the filling firms up as it sits. Dust with cocoa powder or powdered sugar right before serving.
 Save
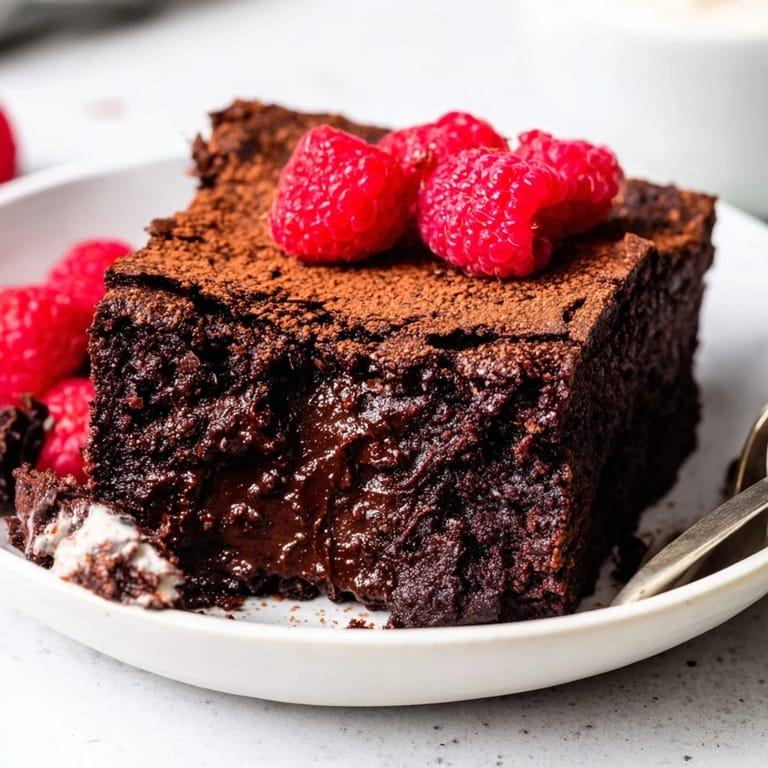
Save The first time I served this, I sliced it too soon and the filling oozed everywhere. It still tasted amazing, but I learned that patience matters. Now I wait until it cools completely and every slice comes out clean with that perfect contrast between crisp shell and dense chocolate center. It is one of those desserts that feels like a small victory every time I pull it off.
Serving Suggestions
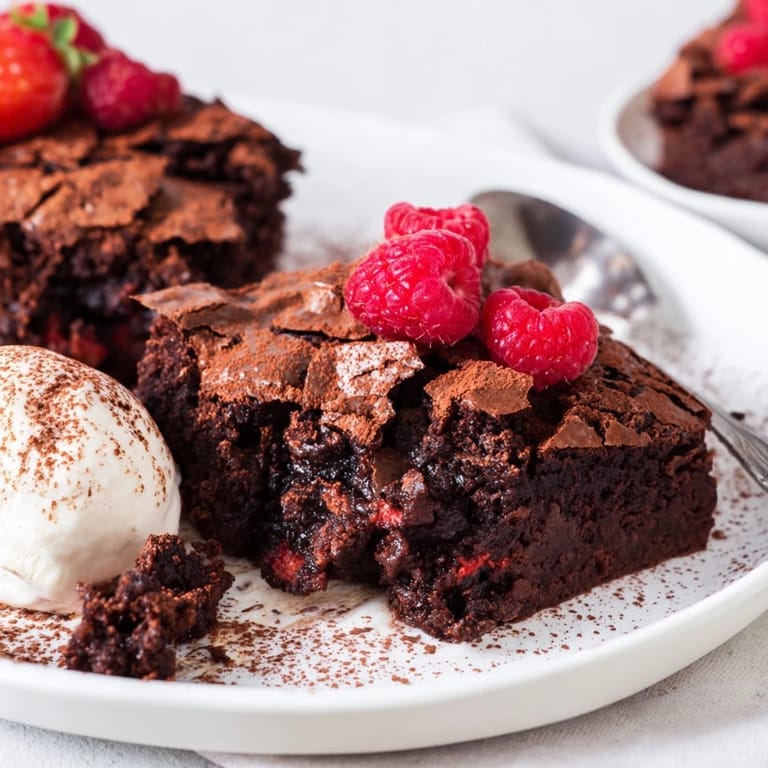
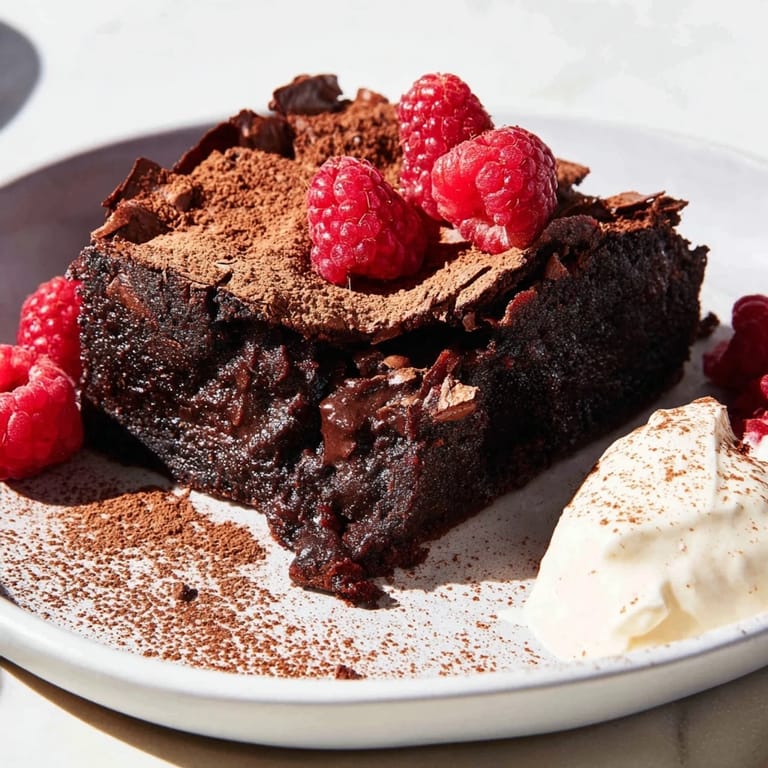
I love serving this with fresh raspberries because the tartness cuts through the richness, but strawberries or a pile of whipped cream work just as well. Sometimes I dust it with cocoa powder for a minimalist look, other times I go all out with powdered sugar and berries. Either way, it looks impressive on the table and tastes even better than it looks.
Storage and Make Ahead
This tart keeps for up to three days in the fridge covered loosely with foil. I actually prefer it the next day when the flavors have settled and the texture gets even fudgier. You can make the tart shell a day ahead and store it at room temperature, then fill and bake it a few hours before serving.
Customizations and Swaps
If you want to add nuts, fold in half a cup of chopped walnuts or pecans right before pouring the batter. I have also stirred in dark chocolate chips for extra melty pockets, and once I swapped the dark chocolate for bittersweet and it turned out just as good. For a gluten-free version, use a one-to-one gluten-free flour blend in both the crust and filling.
- Try adding a pinch of espresso powder to the batter, it makes the chocolate taste deeper without adding coffee flavor.
- Swap brown sugar for coconut sugar if you want a hint of caramel.
- Top with flaky sea salt right after baking for a sweet and salty finish.
 Save
Save This tart has become my go-to when I want to feel like I made something beautiful without spending all day in the kitchen. It is proof that a few quality ingredients and a little care can turn into something worth sharing.
Recipe FAQs
- → How do I prevent the tart shell from becoming soggy?
Blind-bake the tart shell before adding the filling to ensure it stays crisp and golden. Use parchment paper and pie weights to keep the shell from puffing.
- → Can I use a different kind of chocolate?
Yes, feel free to use semi-sweet or milk chocolate, but adjusting sugar levels may be necessary to maintain the balance of sweetness.
- → What is the best way to melt the chocolate and butter?
Gently melt chocolate and butter over a simmering water bath or in short microwave bursts, stirring frequently to avoid burning.
- → How do I know when the tart is perfectly baked?
Bake until the edges are set but the center remains slightly soft; it will firm up as it cools to yield a fudgy texture.
- → Can I make this tart gluten-free?
Substitute all-purpose flour with a gluten-free flour blend suitable for baking to accommodate dietary needs without compromising texture.